
Cooking with a Dutch oven while camping opens up a world of delicious possibilities—from fresh-baked bread to hearty stews and even desserts.
This guide will show you exactly how to use a Dutch oven camping, covering everything from setup and temperature control to cleaning and pro tips. Whether you’re a beginner or a seasoned camper, you’ll discover expert insights and unique tricks to elevate your campfire meals.
Key Takeaways
- Master Dutch oven camping by balancing coals above and below for even heat.
- Choose a camp-specific, seasoned cast iron Dutch oven for best results.
- Rotate oven and lid regularly to prevent hot spots and burnt food.
- Clean with hot water only; dry and oil after each use to prevent rust.
- Use parchment or foil liners for easy cleanup when baking or making sticky dishes.
Choosing and Prepping Your Dutch Oven
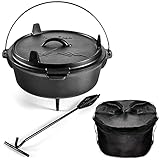
What Makes a Camping Dutch Oven Different?
- Legs: Keep the oven stable above coals.
- Flat, Rimmed Lid: Holds hot coals for top-down heat—essential for baking.
- Cast Iron: Distributes heat evenly and retains it for slow cooking.
How to Season Your Dutch Oven
- Wash with hot water and dry thoroughly.
- Rub inside and out with a thin layer of cooking oil.
- Bake in a home oven at 350°F for 1 hour.
- Let cool, then wipe off excess oil.
Repeat after each use to maintain nonstick surface and prevent rust.
Setting Up: Equipment and Safety
Essential Gear
- Charcoal chimney or firestarter
- Long tongs and heat-resistant gloves
- Lid lifter or pliers
- Aluminum foil or parchment (for lining and easy cleanup)
- Tripod or campfire grate (optional)
Safety Tips
- Set up on a flat, stable surface away from tents and foot traffic.
- Keep water and a shovel nearby for fire safety.
- Always use gloves when handling hot cast iron.
Cooking with a Dutch Oven: Step-by-Step
1. Prepare Your Coals
- Use a chimney starter for even, hot coals.
- For 350°F, use about twice the oven’s diameter in coals (e.g., 12-inch oven = 24 coals).
- Place ⅓ of coals under the oven, ⅔ on the lid for baking; reverse for simmering.
2. Manage Temperature Like a Pro
- Rotate the oven and lid 90° in opposite directions every 15 minutes.
- Add fresh coals as needed for longer cooks.
- Use a trivet or cake pan inside the oven to prevent burning delicate foods.
3. Cooking Methods
Baking
- Place most coals on the lid, fewer below.
- Vent steam by slightly offsetting the lid or using metal skewers.
Simmering/Stewing
- Use more coals underneath, fewer on top.
- Stir occasionally to prevent sticking.
Roasting
- Distribute coals evenly above and below.
- Check food regularly to avoid burning.
4. Pro Tips and Unique Hacks
- Stacking: Cook multiple dishes by stacking ovens—most heat on the top oven.
- Foil or Parchment Liners: Great for sticky desserts or easy cleanup.
- Steam Venting: Use a metal skewer to prop the lid and let steam escape for crispier crusts.
- Dutch Oven Pizza: Place a trivet at the bottom to prevent burnt crust.
Related: How to Use Camping Stove
Cleaning and Caring for Your Dutch Oven
After Cooking
- Let the oven cool slightly.
- Clean with hot water and a soft brush—avoid soap.
- For stuck-on food, use coarse salt as a scrub.
- Dry thoroughly over the fire or stove.
- Rub with a thin layer of oil before storing.
- Store with lid ajar and a paper towel inside to absorb moisture.
If Rust Appears
- Scrub with steel wool, rinse, dry, and re-season as above.
Dutch Oven Camping Recipes to Try
- Classic Campfire Chili: Brown meat, add beans, tomatoes, and spices; simmer over coals.
- Dutch Oven Lasagna: Layer noodles, sauce, cheese, and bake with coals above and below.
- Peach Cobbler: Line with parchment, add canned peaches and cake mix, bake until golden.
Related: Stockpiling Essentials: A Guide To Food That Lasts The Longest
Frequently Asked Questions
How do I know if my Dutch oven is hot enough?
Sprinkle a few drops of water inside—if they sizzle and evaporate, it’s ready.
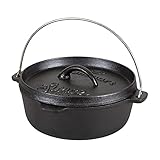
Can I use my kitchen Dutch oven for camping?
Only if it’s bare cast iron; avoid enameled or nonstick models over open fire.
What’s the best way to prevent food from burning?
Rotate oven and lid, use a trivet, and check food regularly.
Conclusion
Using a Dutch oven camping transforms your outdoor meals, letting you bake, roast, and simmer with ease. By mastering temperature control, using the right gear, and following expert tips, you’ll create memorable campfire feasts and enjoy hassle-free cleanup.
Ready to level up your camp cooking? Grab your Dutch oven and start experimenting—your next great meal is just a fire away!
Leave a Reply