Camping offers a unique opportunity to immerse yourself in nature and create lasting memories. Whether you’re a seasoned outdoor enthusiast or a novice camper, capturing these moments through photography can help you relive your adventures for years to come. In this guide, we’ll explore essential tips to elevate your camping photography skills and ensure you return home with stunning images that truly reflect your outdoor experiences.
Understanding Your Camera: The Foundation of Great Shots
Before embarking on your camping trip, it’s crucial to familiarize yourself with your camera’s settings. Whether you’re using a smartphone, a point-and-shoot, or a DSLR, understanding the basics of aperture, shutter speed, and ISO will give you greater control over your images. Take some time to practice using different modes, such as landscape and night settings, to prepare for various camping scenarios.
Mastering Composition: Framing Your Outdoor Memories
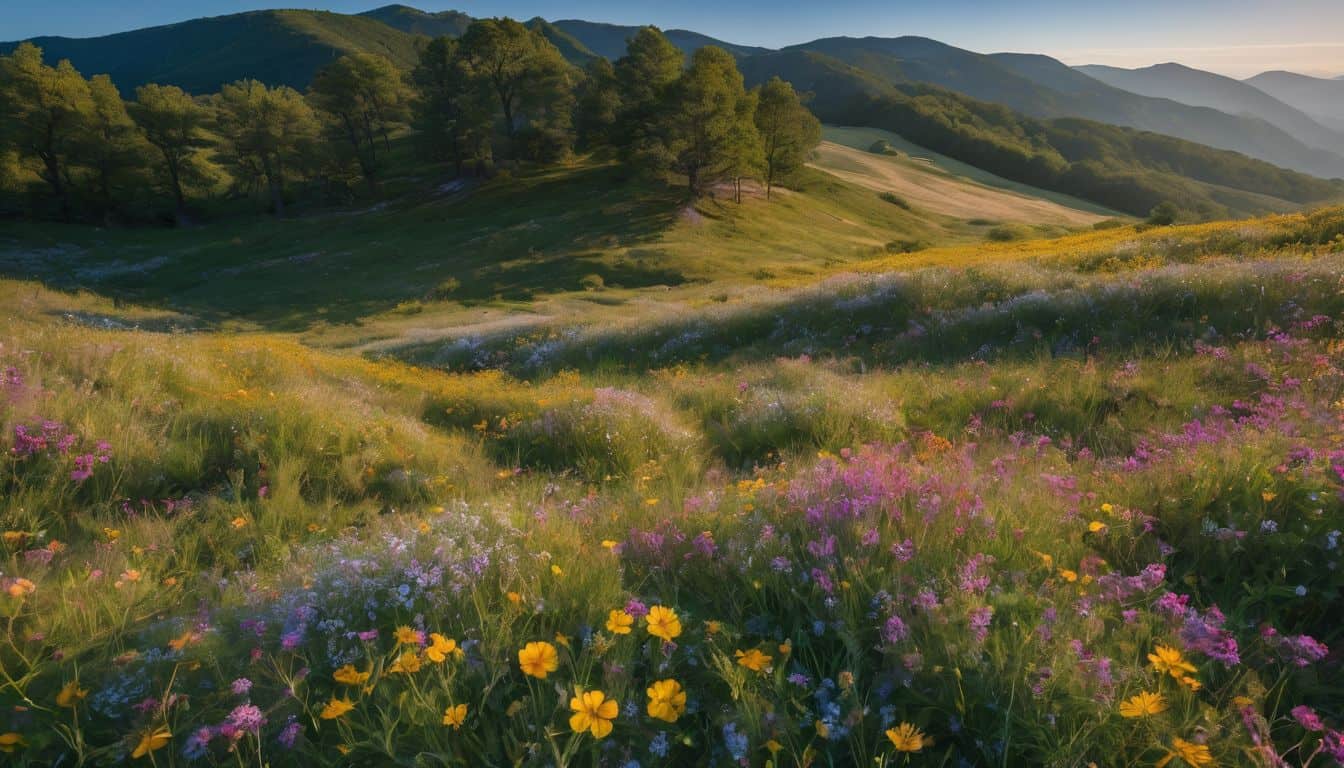
Composition is key to creating visually appealing photographs. One of the most useful techniques is the rule of thirds. Imagine your frame divided into a 3×3 grid and place your main subject along these lines or at their intersections. This simple trick can dramatically improve the balance and interest of your shots.
When photographing your campsite, look for natural framing elements like trees or rock formations to add depth and context to your images. Don’t be afraid to experiment with different angles – get low to the ground to capture wildflowers in the foreground or climb to a vantage point for a sweeping vista of your campsite.

 Photography Tips: Composition & Lighting Cheat...
 20 Pcs 2" inch Metal Spring Clamps, Heavy Duty...


Harnessing the Power of Light
Lighting can make or break your camping photographs. The golden hours – just after sunrise and before sunset – offer soft, warm light that can transform an ordinary scene into something magical. During these times, the low angle of the sun creates long shadows and a beautiful glow, perfect for capturing the essence of your outdoor adventure.
For portraits of your fellow campers, avoid the harsh midday sun. Instead, seek out shaded areas or use diffused light for more flattering results. If you’re feeling adventurous, try your hand at night photography. Use a tripod and experiment with long exposures to capture star trails or the ethereal glow of the Milky Way above your tent.
Essential Shots to Capture
To tell the complete story of your camping trip, aim to capture a variety of shots:
- Your campsite setup, including tents, RVs, or hammocks.
- Candid moments of campers enjoying activities.
- Landscape vistas and natural details.
- Campfire scenes and food preparation.
- Wildlife (from a safe distance).
These diverse images will help you create a comprehensive visual narrative of your outdoor experience.
Night Photography: Capturing the Starry Skies
Night photography can be challenging but incredibly rewarding. Use a sturdy tripod to keep your camera stable during long exposures. Experiment with different shutter speeds to capture star trails or the Milky Way. A remote shutter release can help prevent camera shake, ensuring crisp, clear images of the night sky.
Gear Considerations for the Outdoor Photographer
When packing for your camping trip, don’t forget these photography essentials:
- Extra batteries and memory cards.
- A lightweight tripod for stability in low light conditions.
- A weather-resistant camera bag to protect your gear from the elements.
Telling Your Camping Story Through Images
Great camping photography goes beyond just capturing pretty scenes. Aim to document the journey, not just the destination. Include people in your shots to add scale and emotion to landscapes. Capture a range of images from wide vistas to close-up details of flora and fauna. This variety will help you create a more engaging and complete visual story of your adventure.
Post-Processing: Enhancing Your Camping Memories
Once you’re back from your trip, take some time to edit your photos. Enhance colors and contrast to bring out the beauty of the natural world. Consider creating a photo book or online gallery to share your adventures with friends and family. For quick edits while still on the trail, there are numerous mobile apps that can help you touch up your images on the go.
Respecting Nature: Eco-Friendly Backpacking and Photography
As outdoor enthusiasts and photographers, it’s our responsibility to protect the natural environments we love to capture. Follow Leave No Trace principles while photographing, be mindful of wildlife and maintain a safe distance. Avoid disturbing natural elements for the sake of a photo, and always prioritize the preservation of the environment over getting the perfect shot.
Practice Makes Perfect
The key to improving your camping photography skills is practice and experimentation. Take lots of photos, try different techniques, and learn from each shot. Don’t be afraid to get creative with your compositions – sometimes, the most unexpected angles can yield the most striking images.
Creating an Eco-Friendly Campsite for Photography
When setting up your campsite, consider how you can minimize your environmental impact while still creating photogenic scenes. Choose natural materials and colors that blend with the surroundings, and arrange your camp to showcase the beauty of the landscape without damaging it.

Conclusion
Remember, the best camera is the one you have with you. Whether you’re using a smartphone or a professional-grade camera, these tips can help you capture the essence of your camping experience. By focusing on composition, lighting, and storytelling, you’ll be able to create stunning images that not only document your adventures but also inspire others to explore and appreciate the great outdoors.
So pack your gear, head out into nature, and start capturing the magic of your camping adventures. With practice and patience, you’ll soon be creating photographs that truly reflect the beauty and excitement of your outdoor experiences.
 Unlorspy 12 Pcs 2 inch Metal Spring Clamps,Tent...
 Easy Campfire Cooking: 200+ Family Fun Recipes for...
 The Complete Guide to Nature Photography:...
 DENALI NATIONAL PARK TRAVEL GUIDE GUIDE 2024:...
 Teenyyou 10 x 16 ft Enchanted Forest Camping...
Leave a Reply